
🛠️ Setup & Configure your CounselMore Portal
⚙️ 1. The videos below will walk you through step-by-step.
⚙️ 2. Watch the videos and pause the video, to make changes in your own account.
⚙️ 3. Keep a list of questions for your live session with a CounselMore Mentor.
⚙️ 4. Reserve your 30 minute complimentary session from the Welcome Page
|
There is a marketing video welcoming the student into their portal. You are welcome to use that video. Available lower on this page. Also, many counselors use short videos to welcome students into the Student Portal. Each assignment serves as a container for related materials, making it easy to pair guidance with action. By adding a brief video to an assignment, counselors can offer a DIY level of support or a warm, low-pressure introduction—without requiring a live meeting. The video does not need to be overly-produced. In the interest of professional development; here is an example of a counselor’s simple welcome message, recorded using Loom with a screen capture tool:
|
Use this video to welcome students to their portal
Add this video to your website and Link to it from your First Routine Assignment. Below is an image of where you'd link the video to a student assignment.

Use the video below in your own practice to help introduce the portal - in a "Welcome" Assignment
🔥🔥🔥 Important to Know 🔥🔥🔥
In this training, you will act as both the Counselor and Student.
To do this, you’ll create two separate browser window sessions — one for each role.
Because your main browser window already has a cookie that identifies you as a counselor, it automatically directs you to the counselor login page when you visit app.counselmore.com.
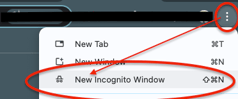
To see the student experience, from the student point-of-view, you’ll need to open an incognito (private) browser window. This incognito window has no cookies saved, so you can log in as if you were the student.
You’re only doing this for the purpose of testing end user experience— under normal circumstances, you would simply click the “View Student Portal as Student” button inside your Counselor Portal. That button will gain you immediate access to any student's portal from their point-of-view.
In this training, the objective is for the Counselor to experience what their customer will experience.
For now, using an incognito window will let you fully experience the student’s point of view and better understand how your clients interact with CounselMore. 👍
Adding Student
-
Begin in the counselor's portal
-
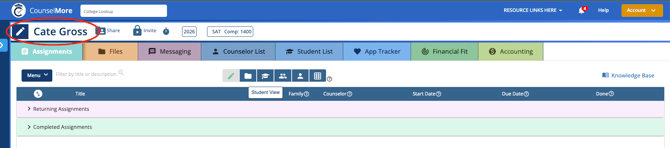
Click the green "Add Student" button in the upper left hand side of your screen

-
Enter your students Account Information such as Name, Grad year, and Status. Active Status for this training. The rest is optional. click Create. The student's record is now created and their name appears center screen, top right corner.
-
Counselor Choice > Do you want to add schools to student list or do you want the student to have access to Search and Add schools to their list?
- If Yes, you do want students to access search - you will enable that in Settings > Client Portal Search Access

-
-
menu button
 and select MY DATABASE
 -
My Database > Community Sourced Lists > Show Results
- Choose a list. After your selection click Show Results.
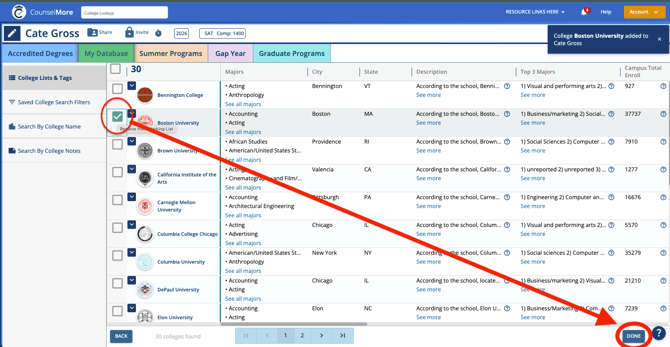
For Now - Navigate to the Counselor list and Add Schools to the Counselor list
-
Choose schools by selecting the grey box to the left of each school name. Click Done on the lower right hand side when finished.
- Choose a list. After your selection click Show Results.
-

Student List
😎 The Student cannot see schools on the Counselor list.
-
When clicking Done, you will be returned to the Counselor list. The Student cannot see schools on the Counselor list. Schools must be promoted to the Student list - then schools are seen in the Student list in the Student portal.
-
Promote schools to the student list by clicking on the graduation cap icon
 .
. -
Click grad caps on some schools and follow them to the student list but clicking to the next tab.

-
From the Student list, click on the smiley face and change it to a heart
 to promote schools to the App Tracker

App Tracker
-
Next click on the App Tracker tab
 this is the list of colleges that the students will be applying to.

Assignments
Counselor Choice: Do you want to show Assignments in the Student Portal?
If Yes, you must complete the following steps for each Assignment:
-
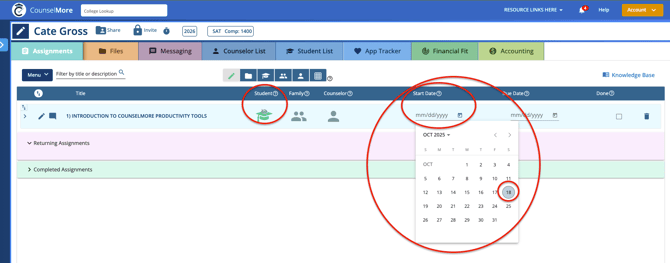
Select the Audience – This determines who the assignment is intended for (e.g., student, parent, both).
-
Set the Start Date – This controls when the assignment will become visible in the student’s portal.
💡 Tip: You can schedule multiple assignments to appear in the future by setting different start dates. This allows you to plan ahead and drip out assignments at the right time.
Self Guided : 5) Routine Assignments
-
Assignments tab
 and click on the menu button
  and select Add Routine Assignments
 -
Every new account will have sample assignments in their Routine Assignments menu. Select any assignment, or make a new ROUTINE ASSIGNMENT. click Close.

-
Next select a Start Date and Due Date for those assignments. Click on the icon that represents the audience of each assignment. If there are multiple members of the audience, click more than one icon. Assignment is for who: student
 , the family
  , or the counselor
Inviting and Sharing
Counselor Choice > Student can be invited to Student Portal when an email address is entered for the student in the Student Information banner. Any email address is accepted.
When an email address is entered, the folder and lock icon will turn blue, indicating both the Google Drive and Student Portal are ready to be shared.
Before inviting the student to he student portal: 1) email address 2) Counselors Google Drive must be connected & 3) the Student Record Status must be Active to Invite the Student.
"I need help connecting my Google Drive..." Click here for live support or email support@counselmore.com

🚧 For this exercise, enter a Student Record email address that you can access the inbox.
🔓 In a separate incognito or private browser window, log into that inbox to view the student invitation - first hand.
☝️ Remember, this step is just for training so you can experience your client’s perspective—normally, you would use the “View Student Portal as Student” feature directly within the counselor portal.
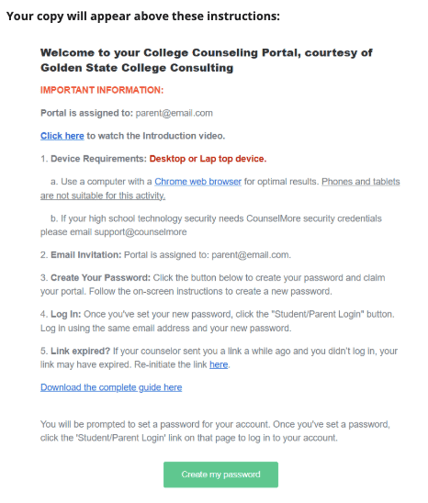
Generic sample of email invite to student for your preview:
Ready to invite the Student to the Student Portal
-
Invite the student to their portal, click on the invite button

-
If you want the student to have access to files, click on the share button

Student Receives Email Invite: Notifications@CounselMore.com
with a button :
-
-
Note: The Counselor has shared a student portal with the student's email address. The student must Create a Password because there is already an email address assigned by the counselor.
- NOTE: If a student wishes to use a different email address, they will need to ask their counselor to send a new invitation to the new email. Students cannot update their email address themselves.
-
The training will now move to the student's perspective (POV).
💡 Critical Step > Enter Student Portal > First Hand POV:
To view both key emails, open a second browser window in incognito (private) mode and navigate to sign into the student’s email inbox.
Look for two messages: one from notifications@counselmore.com inviting the student to their Student Portal, and another notification from the Counselor's Google Drive indicating that the counselor has shared a folder with the student.
Email Invite
-
Go to the web browser window for the student. Log into the mock student's email inbox.
-
Retrieve your student portal invite AND Google drive invite. (If you have not yet connected GD - don't worry, skip it for now and continue your focus on the Student Portal Invite to Student Portal Journey.)
Counselors Choice >
Invitation Emails | Custom Domains | Student Portal Login Pages | Student Portal Intake Survey Questions | Counselor Logo
Customizing your Standard Student Portal invitation, as well as setting up a white-labeled URL or domain, is entirely up to you as the Counselor.
You also have full control over the appearance and content of the Student Portal login page, along with the intake questions students see when accessing the portal for the first time. These areas can all be tailored beyond adding your logo, allowing for a student experience that aligns with your counseling practice.
Contact Support@counselmore.com or https://www.counselmore.com/custom-solutions
Student Portal View

Counselors Choice >
Student Portal Resource Menu
Counselors can add helpful links to external resources they want students to access. Learn how to build a custom menu of resources for your practice and your clients here: https://helpdesk.counselmore.com/new-accounts-build-a-custom-menu-of-resources-for-yourself-and-your-clients
Tabs in the Student Portal

-
 The Counselor must promote schools to the Student list or allow the student to add schools to the list.
 -
 The student or counselor must promote schools to the App Tracker
 - Each Tab has a Menu button
What does the Parent Portal look like to the Parent who has siblings (two students)?

👍 Now that you've complete the Self Study, make a list of your questions and reserve a seat at a live training checkup. You will find a complete schedule here.
Return to the previous section in your Training Program
1) Account Settings & Customization
👉 Continue your learning journey: Proceed with the next Training Programs below.
4) Google Drive Prep & Connect