Zapier was a suggestion from our Collaboration Lab.
CounselMore members directly participate in the shaping of their educational tools. Cast your vote too!
Zapier integration will continue to expand based on our members' requests. When you are ready to add new push/pull triggers to your Zapier account - just contact your CounselMore support team to have those added.
Zapier is only available on the 2024 CounselMore platform. If you are on a legacy plan, you will need to upgrade to access Zapier and other advanced capabilities.
Follow the steps below to setup your integration
1) Head to Settings > Account Setup > Client Portal Customizations > Zapier Settings

You will see this icon ![]() integrated into various areas, such as the personal information of your students and contacts.
integrated into various areas, such as the personal information of your students and contacts.


2) Create a Zapier account if you do not have one already.
Tip: Go here to sign up

3) From your Zapier Dashboard, head to + Create > Zaps

4) Click "1. Trigger"

5) Then search for CounselMore

6) Under "Event" select "Contact pushed from CounselMore" and Continue

7) Click "sign in" under the Account section and enter your CounselMore username & password and click "Yes, Continue to CounselMore"

8) You should now be back in the "Account" section of your Trigger where you can click "Continue"

Then "Test Trigger"

9) At this point you're likely to see a message telling you there's no contacts found.

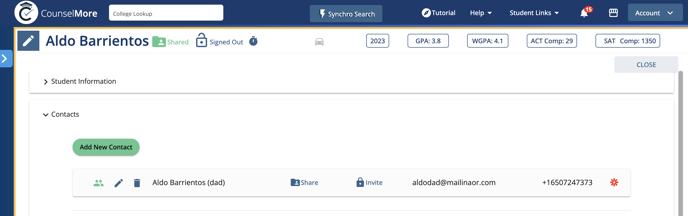
10) Head to your CounselMore portal, and navigate to any Student Record > Student Profile > Contacts and you'll notice a Zapier icon to the right of every contact. Click the Zapier icon.

11) Now return to Zapier and click "Test Trigger"

12) You should now see confirmation of a successful test. Click "Continue with select record"

13) Now it's time to select an action. We can connect any platform we choose:
- Google Contacts
- Hubspot (or any other CRM)
- Acuity Scheduling
The possibilities are endless. For our use case, we'll send CM Contact information to Google Contacts to sync my data.

14) There are various action events you can choose from depending on your use case but for simplicity we have chosen the "create contact" event. Click "Continue".

15) Under Account click "Sign in"

16) Authenticate to your Google Account. Accept and Allow all permissions until you're back in Zapier and see your information under the account section. Click "Continue"

17) The "Action" section is very important. We will map the data coming from CM directly to the contact we are automatically creating in Google Contacts. Clicking any field, "First Name" for example, will pull up a list of datapoints that CM sent over to Zapier. You can use these datapoints to auto-populate fields in your actions. In this case it's very straight forward. Pick "first name" and the other fields accordingly.
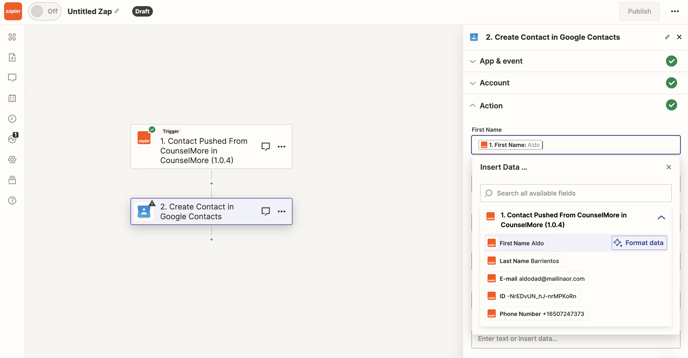
Your action should have the following fields filled out:
- First Name
- Last Name
- Phone number (recommended)

Ignore all other fields and scroll down to click "Continue"
18) You should now be in the "Test" section of your action. Click "Test Step"

19) You should see a confirmation that a contact was pushed to Google Contacts

Head over to contacts.google.com and you should see the test contact you just pushed

20) If everything looks good head back to Zapier and click "Publish" to finalize your Zap.

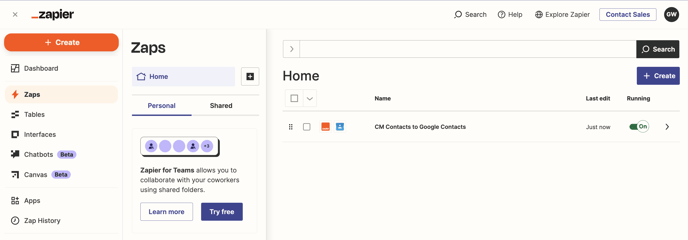
21) You should now see your Zap as "On" in your Zapier Dashboard
That's it!
From now on, any contact that you press the Zapier button for, will get pushed to Google Contacts within 15 minutes.